Hello! I thought I'd share a little project I did as a housewarming gift for a friend at work. I got the idea for this jar on Pinterest (where else, right?!) and was so excited when I got the opportunity to make one--I jumped right in!
 |
| Top front view of the jar. |
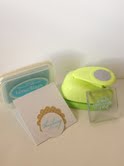
After finding the perfect jar, the next step was to choose a color theme--easy enough--my friend's favorite color is purple. I made crinkle paper out of purple paper scraps for the inside base of the jar and then added the goodies including a candle, a chevron-patterned nightlight, and a few other small toiletry items that may not be easily accessible during moving (cotton balls, bandaids, a nail kit, etc.).
 |
| Top view of the jar. |
Next was the fun part! I used my Sizzix scallop circle Framelits and purple paper scraps to create this cute little label for the lid of the jar. I used foam squares to raise the second layer of the label and a paper piercer to add detail to the edge of the scallops on the top layer. I stamped the sentiment using one of my Fiskars stamp sets with Paper Studio lavender ink. To add a little dimension and embellishing to the sentiment I popped up a tiny purple heart with a lavender rhinestone in the middle.
 |
| Front view of the jar. |
I finished it off with a ribbon around the edge of lid. This was a lot of fun to make and even more fun to give! I love finding ways to use up scraps and making crinkle paper is a great way to do that! I will definitely be using this gift idea in the future--the possibilities are endless...birthday, baby shower, house warming, new job, graduation...............
Thanks for stopping by...go create something beautiful today!